Introduction
Touring with a fully-loaded 4×4 can be strenuous, but not when you’ve mastered your roof rack usage. In this article, you’ll discover essential tips that can revolutionise the way you utilise your touring vehicle’s roof rack, making your trips not just more convenient, but safer too. So, buckle up and get ready to explore new heights in vehicle storage solutions!

The Need for Effective Roof Rack Usage in Touring Vehicles
Understanding the significance of utilising roof racks on touring vehicles is paramount. When you’re on a lengthy journey, roof racks can provide essential storage space, allowing for an organised, clutter-free interior and a safer – more comfortable ride.
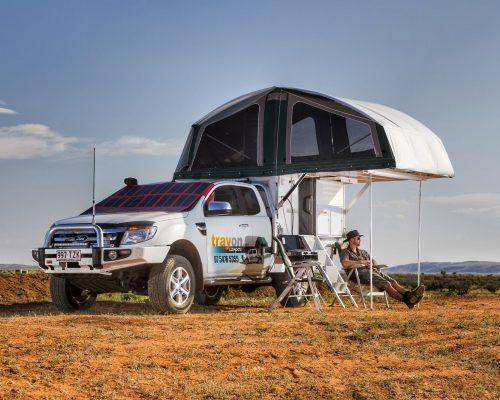
At Trayon Campers we have discovered a real desire from our customers for a turnkey touring vehicle construction service. Where we source a new 4WD ute and set it up for touring with accessories like GVM upgrades, bull bars, spotlights, long-range fuel tanks, roof racks and many more.
Most of our customers want to go remote, and a Trayon Camper is designed just for that, it eliminates the need for towing a trailer, enhancing off-road ability and maneuverability.
One key aspect of building a capable touring vehicle is weight distribution. And with a bit of forward thinking, roof racks can play a pivotal role in helping to distribute weight. Here’s why that’s important.
Why Proper Weight Distribution is Crucial for Your 4WD and Trayon Setup
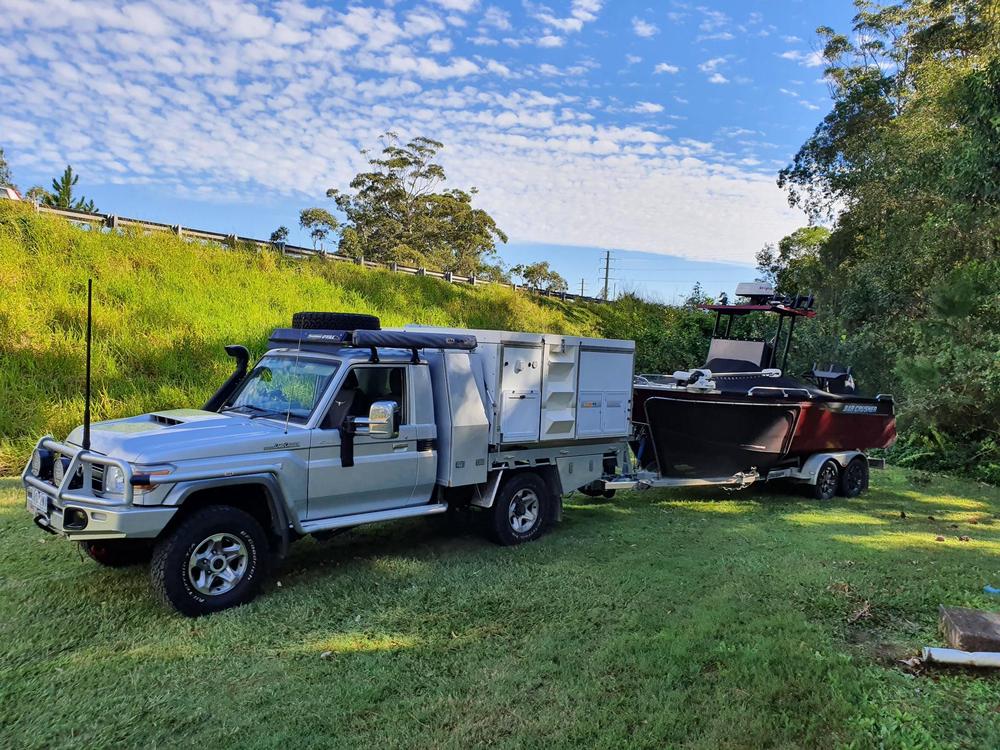
When you’re embarking on an off-road adventure with your 4WD ute with a slide on camper on the back, ensuring the weight distribution is right becomes paramount. A balanced load not only enhances the stability and maneuverability of your vehicle but also guarantees a safer and more comfortable journey through rough terrains. It’s important to remember that an un-distributed load can lead to swaying motion increased fuel consumption, as well as potential damage to your vehicle and/or gear.
Trayon Campers are designed with this principle in mind. Their engineering ensures that the majority of the weight is concentrated within the one third of the front of the camper, which effectively minimises strain on your rear axle and shifts the center of gravity toward the center of the two axles (middle of the vehicle). You can also setup your ute with toolboxes mounted under the tray to store heavy (and dirty) recovery gear, this also helps with stability by lowering the center of gravity. Over all these changes contribute to a more fuel efficient expedition.
When it comes to roof racks, it’s another great place to put items between the front and rear axle, thereby shifting the weight to be more evenly distributed. Keep in mind, it’s important to evenly distribute the weight of the items across your roof rack, that way you minimise the risk of overloading one side, which could lead to potential vehicle tilting or swaying over rough terrain or in high winds.
Understanding Roof Rack Options
There are so many options to choose from it can be overwhelming, that’s why in our Turnkey offering – we handle that part for you. Because we know what works out west.
Some may opt for a roof rack basket for its sturdiness and ease of access, while others might prefer a roof box for its aerodynamics and security features.
Each option has its pros and cons—weighing these factors against your specific needs will lead you to the right choice.
The importance of accessibility and convenience in storage planning cannot be overstated. After all, there’s nothing more frustrating than needing an item and finding it buried underneath a mountain of gear or there is some convoluted way to detach it from the rack.
Strategically organising your items—keeping frequently used items easily accessible and items not often used (think second spare wheel, jerry cans etc) out of the way; and lets not forget keeping heavier items closer to the vehicle’s center—can save you both time and energy on the road.
Often canopy companies make use of the back wall of the canopy for items like jerry cans and second spare wheels but this is not only improper weight distribution (seeing as a spare wheel can weigh 30-40kg and two full jerry cans 40kg) by placing these heavy items so far behind the rear axle, it also places them in a high human traffic area during camp and consumes space that may otherwise be utilised for more used items – like a shower tent.

Embracing Australian-Made Gear – Tradesman Roof Rack
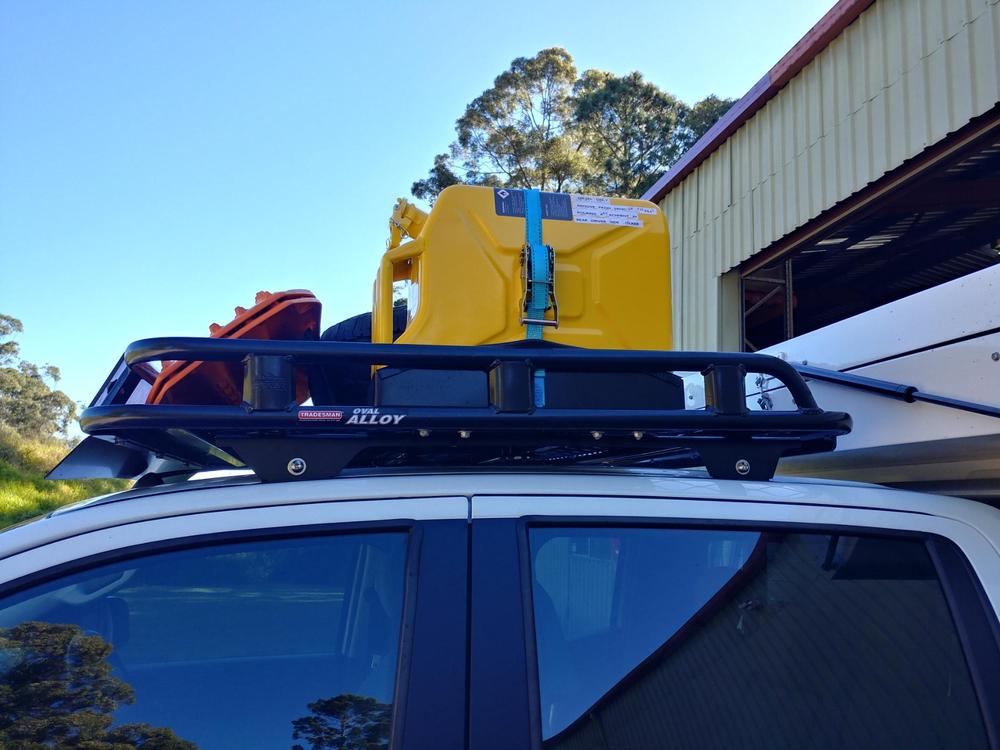
Being an Australian Made, Family Owned company, Trayon Campers focus on Australian-made gear when we source other components from third parties. We commonly use the Tradesmen Roof Racks because it offers an exceptional range of locally manufactured roof racks that stand out in the crowd.
Not only do you get to support local industry, but you also benefit from top-quality products that meet and exceed Australian standards.
Tradesmen Roof Racks are engineered with unique features and accessories that enhance their functionality. For instance; their fully welded mesh floors provide excellent load support and make securing your gear a breeze.
They also offer a variety of mounting options ensuring compatibility with a wide range of vehicles and loading requirements. Additionally; their powder-coated finish ensures durability in harsh Australian climatic conditions.
So, when you opt for Tradesmen Roof Racks, you’re investing in reliable, high-quality, and Australian-made gear that’s built to last. Supporting Australian-made gear not only fuels the local economy but also strengthens the Australian manufacturing industry. Embrace the Aussie spirit and consider Australian-made gear for your touring vehicle needs because we do Touring the best.

Mastering a Second Spare Tire Storage
Touring vehicle owners understand the importance of carrying a spare tyre. But what about a second spare? The value of having an additional spare tyre cannot be overstated, especially when embarking on lengthy or remote journeys. The rule of thumb is that you have a spare wheel for every axle. We’ve seen it time and time again with over 1500+ campers sold, one common life saver is seconds spare tire.
It serves as an extra safety net, ensuring you’re not left stranded due to multiple tyre issues. Storing this second spare tyre, however, can present its challenges.
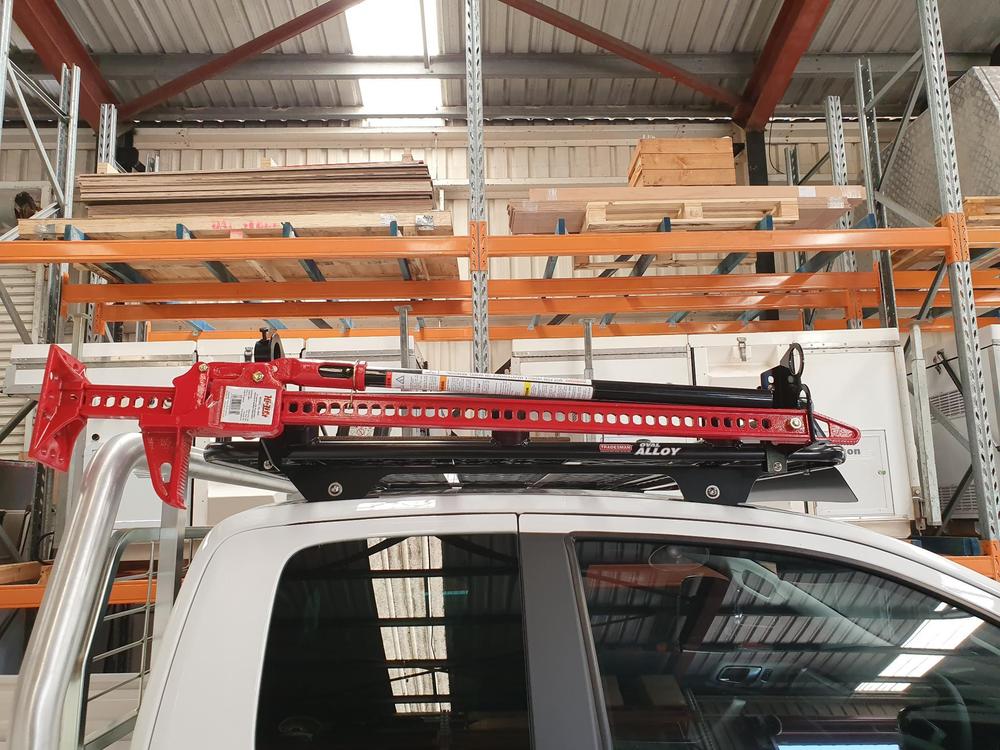
With careful tire selection and while driving according to your conditions, its unlikely that the second spare needs to be accesses as regularly as your primary spare, so it can be placed on the roof rack along with other backup items like jerry cans, shovels, high lift jacks, and antennas. This keeps them out of the way but still with you incase you need them.
Roof racks are convenient for this purpose but accessing the tyre when needed can be a tricky task. This is where the ingenuity of Trayon Camper’s slide-on campers comes into play.
Preparing for Tire Replacement in Remote Areas
In the midst of remote terrains, the value of being ready for tyre replacements is paramount, potentially saving you from the proverbial sticky wicket. It’s not just about having spare tyres but also having the know-how to replace them safely and efficiently.
To do this; always carry a jack suitable for your vehicle’s weight, tyre iron, tyre inflator and repair kit. Familiarise yourself with the process of tyre replacement before embarking on your journey to ensure a swift and safe procedure.
Be sure to park on stable, flat ground when changing the tyre to avoid the vehicle tipping. Remember; it’s also crucial to regularly check the condition of your spare tyres. Weather conditions – especially the sweltering Australian heat, can degrade the rubber over time. The last thing you need in a remote area is a spare tyre that’s just as worn as the one needing replacement.
How to Access Your Roof Rack Spare Tyre with a Trayon
Here’s how you can access the tyre on your roof rack with a Trayon Camper setup;
Dealing with a flat tyre in the bush is never enjoyable but if you have a Trayon Camper and a spare tyre on your roof rack it can make the process easier.
Lots of people ask how to access the spare wheel when needed if its on the roof of the vehicle and weights 30-40kg.
Tip: a Trayon Camper can free-stand, so if you find some reasonably level ground, attach the free standing legs and jack the Trayon off your ute. Once it is raised enough off the bed; you can slowly move the 4WD forward to create some space on the tray between the camper and the headboard.
This area will come in handy when handling the tyre acting as a little platform for you to reach the spare wheel on the roof rack. Get on the tray and then at waist height – Remove the spare tyre and place it on the tray next to you. Hop off the tray and then lower the wheel to the ground so you can replace it with the damaged one. Simply reverse this procedure for the placement of the wheel on the roof rack.
Instead of one big lift, do two smaller ones without reaching above your shoulders. Work smarter; not harder!

Improving Acces to Roof Racks for General Use
The great thing about having a ute, is that you always have a Tray to access the roof rack. However, what if you need something quick and you don’t want to free stand the camper.
Consider adding a few accessories to your setup to help with that.
You can attach brackets to the door seal bracket of your car or using side steps with a midway step can greatly improve the process making it smoother and safer. These simple additions offer a level of convenience ensuring that you can easily get back on track and continue your adventurous journey in the outback.
Conclusion
Let’s face it Roof racks are like the Swiss Army knives for the off road enthusiast. A great place to store dirty equipment, spare fuel, water, high lift jacks and a second spare tire. There are any number of ways you can set them up for your personal needs and preferences. They are also a useful tool to help distribute weight between your front and rear axle helping to provide a safer and more stable journey. It is a bit of an art learning to evenly pack a roof rack for weight distribution and accessibility but with a little practise and with the tips provided in this article – you’ll be a pro in no time.
If you are looking for your ideal touring vehicle – please check out our turn key option and we can save you from alot of overwhelm choosing from the vast number of optional accessories and get great prices for you.
Frequently Asked Questions (FAQ)
Do roof racks affect fuel economy?
Yep; roof racks can definitely impact your fuel economy. How much you ask? It varies but you could see an increase of around 1 to 2 litres per 100kms. Keep in mind – 4WDs aren’t exactly known for their aerodynamics so the impact might not be as dramatic as on a sedan but every litre counts when you’re touring the bush.
What is the difference between roof rails and roof racks?
Roof rails run along the length of the vehicle’s roof and are more for show than utility. Roof racks, on the other hand, are the real deal – they’re designed to carry loads and often sit on top of roof rails. In simple terms; roof rails are like the tracks and the roof rack is the train.
Is a roof rack better than a hitch rack?
It depends on what you’re hauling. Roof racks are versatile but can affect aerodynamics and fuel economy. Hitch racks are easier to access and won’t mess with your 4WD’s aerodynamics but they can limit rear access and block number plates and taillights. Both have their merits; it’s all about what suits your needs best.
How much weight can a roof rack handle?
The weight capacity varies by vehicle make and model but generally you’re looking at around 75 to 100 kgs for most 4WDs. Always check your vehicle’s manual to be certain, and remember that you also have to factor in the weight of the roof rack itself.
What happens if you put too much weight on a roof rack?
Overloading your roof rack can lead to a whole heap of problems like reduced stability, poor handling and increased fuel consumption. Worse still – you risk damaging your vehicle’s roof, the rack itself or suspension and that’s not a cheap fix.
What is the roof load limit for a Toyota HiLux?
For a Toyota HiLux; the roof load limit generally sits around the 75 to 100 kg mark. But don’t take our word for it; always check the owner’s manual for the nitty-gritty details especially if you’re planning a big haul.